DIY birthday cards: instructions, ideas, inspirations
Homemade birthday cards are a great and very personal gift . Show your creativity and delight your loved ones with a nice homemade card! Keep scrolling to find many instructions and ideas how to design awesome DIY birthday cards!
DIY birthday cards: Birthday card with flowers

For this you need:
- Piece of watercolour paper 20 x 14 cm
- thin brush
- white, purple, pink and blue watercolour paint
- Glass with water
- ruler
- thin black marker
DIY birthday cards

How to do it:
- Fold the paper in the middle.
- Dip the brush into the water and take some water color with it. Make a point and smear it up. With the same method make 3-4 flowers. Let the card dry well.
- After the paper has dried, draw the stems and the leaves of the flowers with black marker.
- Dunk a clean brush into the water and white watercolour paint and sprinkle the flowers with it to add great white accent.
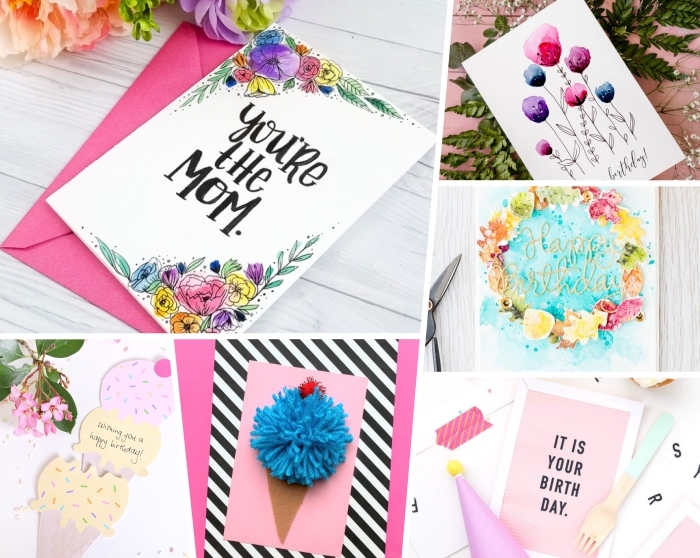
Great homemade birthday card for Mum!

DIY birthday cards with template

For this you need:
- Template 1
- colouring pencils
- Template 2
- 3 sheets of paper 20 x 14 cm
- Template 3
- black marker
Which template do you like best?

How to do it:
- First template: Print the template. Fold the paper in the middle. Colour the elements in the desired colours.
- Second Template: Print the template. Fold the paper in the middle. Join the dots to draw the piece of pie. Color the card.
- Third Template: Print the template and fold the card in the middle. Mark the words that you like.
Creative birthday card in just a few steps!

Card with floral motifs – Design 1

For this you need:
- Watercolour paper 20 x 14 cm
- ruler
- watercolours
- brush
- Glass with water
- pencil
- black pen
- black marker
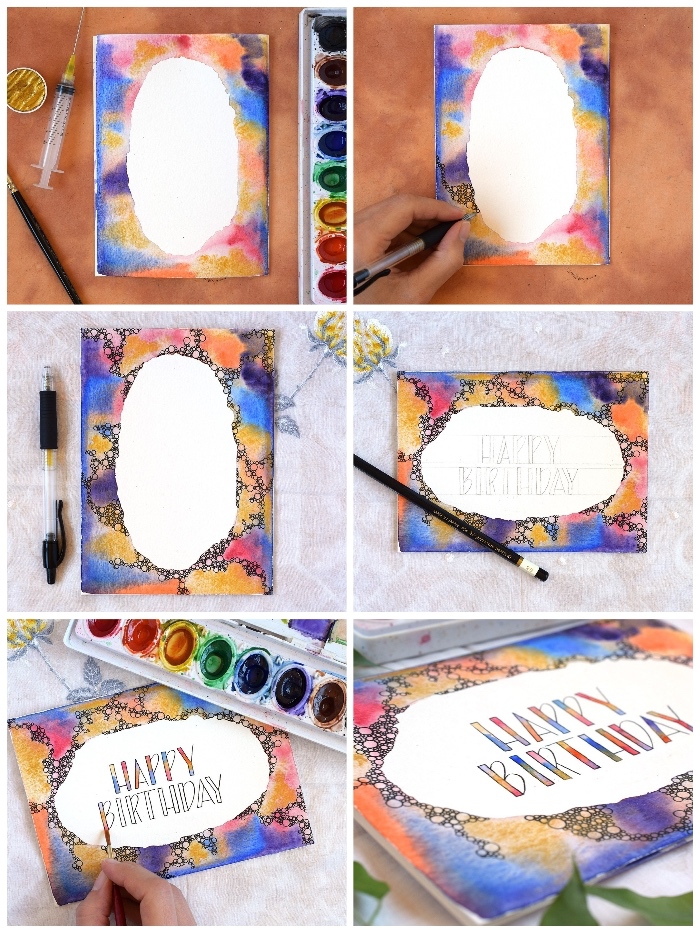
Paint flowers with watercolours

How to do it:
- Fold the watercolour paper in the middle. To make it easier for you, you can use the ruler.
- Unfold the card. Take a lot of water and some water color with the brush. Make a big circle in the corner and smudge it. In the same way you make another 5-6 small circles and a pair of green leaves. Decorate the opposite corner the same way. Let the card dry well.
- Decorate the card with black pencil.
- Write a wish in pencil. If necessary, use the ruler to make sure the letters are the same size.
- Darken the letters with black marker.
Colourful homemade birthday card

Creative and personal gift

Birthday Card Ice Cream

For this you need:
- Ice cream template
- cardstock
- scissors
- bone folder
- ruler
- black pen or thin marker
- double-sided adhesive tape
DIY birthday card ice cream

How to do it:
- Print the template.
- Cut out the ice cream shapes.
- Fold across the white lines by using the folder and ruler.
- Attach the two pieces of ice cream together with double-sided tape.
- Write a wish on the ice cream with the two balls and put it in the ice cream cone.
Amazing birthday cards

Birthday cards “You are a star”

For this you need:
- White paper
- template
- scissors
- X-Acto knife
- double-sided adhesive tape
- Glitter
- ruler
- plastic sheet
Print template and cut out

How to do it:
- Print the template and cut it out.
- Cut out the star using the X-Acto knife.
- Cut out a small piece of plastic wrap and stick it to the card with double-sided tape.
- Put some glitter in the star and attach a piece of paper to it.
Very easy

Great birthday card for a loved one

Birthday card in pink and white

For this you need:
- Frame Template
- scissors
- X-Acto knife
- black marker
- white card stock
- pink card stock 20 x 14 cm
- double-sided adhesive tape
- Letters template (search the internet for a template you like)

How to do it:
- Fold the pink card stock in the middle.
- Print the frame template and cut it out.
- Print the letter template and cut out the letters you need.
- Write a wish on the pink card stock by placing the template on it and filling the letters with a black marker.
- Attach the frame to the pink card stock with double-sided tape.
You can write anything you like on this card

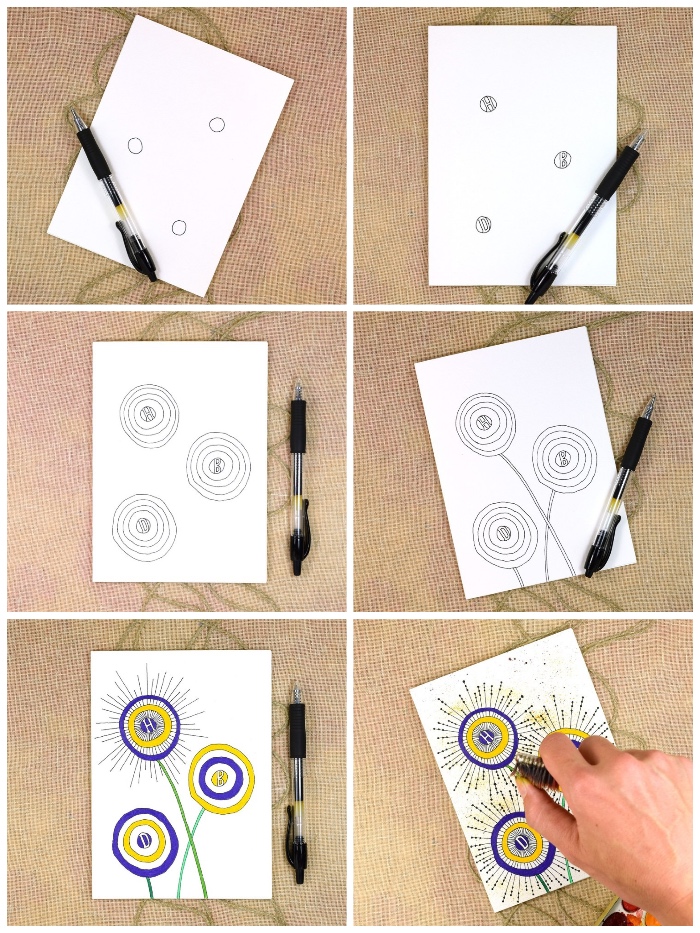
Birthday card with geometric flowers

For this you need:
- Card stock 20 x 14 cm
- coloured pencils
- black fibre pen
- golden color

How to do it:
- Fold the card stock in the middle. To make it easier for you, you can use a ruler.
- Draw three small circles with the black fibre pen. To personalise the card, for example, you can write in it the first letter of your name and the first letter of the person’s name.
- Draw another 4-5 circles and the stems of the flowers. Color the flowers in your desired colours.
- Decorate the card with golden color.
Geometric birthday card

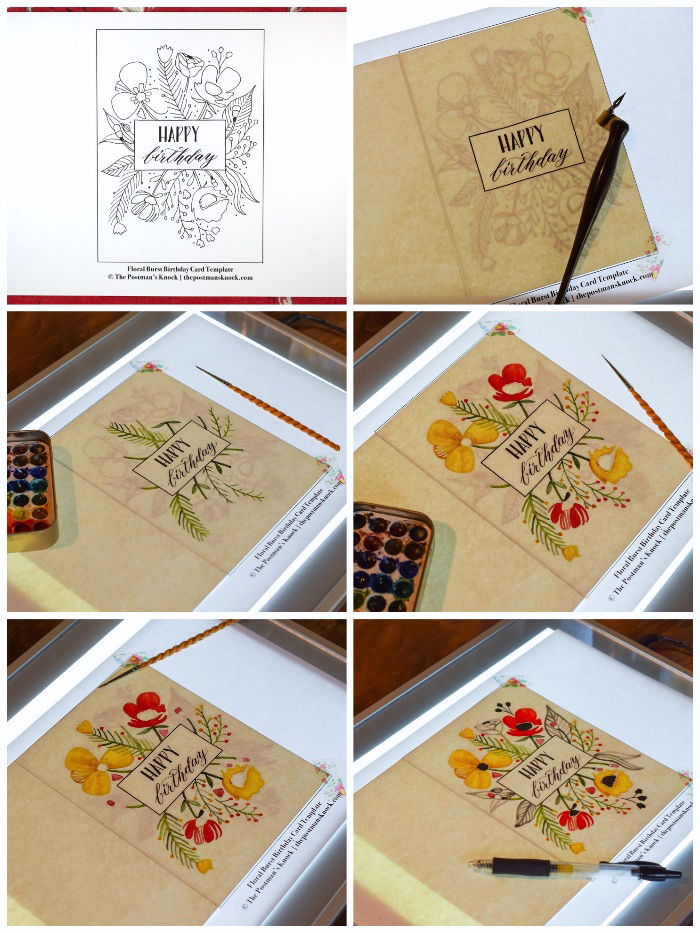
Birthday card with floral motifs – Design 2

For this you need:
- Birthday card template
- watercolours
- brush
- Glass with water
- black and golden ink
- Calligraphy pen
- white printing paper
- brown paper 20 x 14 cm
- Washi tape
- scissors
Paint picture

How to do it:
- Print the template.
- Fold the brown paper in the middle.
- Place the brown paper on the original and trace the letters with black ink. To make it easier for you, you can attach the brown paper to the template with Washi Tape.
- Paint the floral motifs with water color. Let the paper dry well.
- Add some accents with the golden ink.
This birthday card is a real masterpiece

DIY birthday cards


Decorate cards with Washi Tapes


Let your creativity take over your mind and body!


Birthday card with cupcake


Card with 3D butterflies


Simply print and colour


Watercolour card


Cool birthday card for a photo fan


DIY birthday cards to try


All you need for a card is solid drawing paper, coloured construction paper, double-sided tape, and a birthday candle to attach to the card. And you’ve already finished decorating the card.

DIY pop up cards


Minimalist birthday card design


DIY birthday card for the music lovers


Simple, yet effective birthday card design


